SSH & Editor Access
So far you've driven the sandbox through sbx run and the agent's own TUI. But a sandbox is a real microVM with its own Linux userland - and sometimes you want to reach into it with your own tools: a plain shell, an editor's Remote-SSH mode, scp, rsync, or a one-off command.
sandboxd exposes exactly that. It runs an SSH endpoint as an API, so you can connect with the standard ssh client you already have - no keys to generate, no passwords to type.
How sandbox SSH works
There are two pieces:
sbx setup ssh- a one-time provisioning helper. It writes a single wildcard block to your~/.ssh/config(and aknown_hostsentry) so that any*.sbxhost routes through sandboxd. It's idempotent - re-run it any time.ssh <sandbox-name>.sbx- your normal SSH client, connecting to a running sandbox by name.
Authentication is not an SSH key or password. sandboxd authenticates you through its daemon Unix socket (the OS-user boundary) combined with an active Docker login. In other words: if you're the logged-in user on this host and you're signed in with sbx login, you're authorized. Nobody else is.
Why this matters: No SSH private key ever enters the sandbox, and no key material is shared with it. The connection is brokered by the daemon - the same structural boundary that keeps your host credentials out of the VM (see The Isolation Proof) also governs who can reach in.
Under the hood, the Host *.sbx block routes every connection through an internal ProxyCommand (sbx ssh proxy) that relays to sandboxd over the daemon socket.
You don't need to start the daemon yourself
If sandboxd isn't running when you connect, the SSH proxy starts it automatically. So a configured ssh sbxlab.sbx (or an IDE reconnecting on launch) just works - you won't get a connection error simply because the daemon was down.
Step 1 - Provision your SSH config (once)
Make sure you're signed in first:
sbx login # skip if already signed in
Then run the one-time setup:
sbx setup ssh
This writes a block like the following to ~/.ssh/config:
Host *.sbx
    # routes through sandboxd - managed by sbx setup ssh
It's a single wildcard entry - not one line per sandbox - so it keeps working as you create and remove sandboxes. Re-running the command is safe; it just rewrites the same block.
Custom host pattern
If *.sbx collides with something in your existing config, pick a different suffix:
sbx setup ssh --alias "*.mysbx"
# then connect with:  ssh sbxlab.mysbx
Step 2 - Open a shell in your sandbox
Your sandbox from the earlier modules is named sbxlab. Connect to it by hostname:
mkdir -p ~/workdemo && cd ~/workdemo
sbx run --name sbxlab codex .
ssh sbxlab.sbx
You land in an interactive shell inside the microVM. Prove where you are:
hostname          # the sandbox, not your Mac
whoami            # the sandbox user, not your host user
pwd               # your mounted workspace
ls ~              # only the workspace - no host home dir
cat ~/.ssh/id_rsa 2>&1   # No such file or directory - your keys aren't here
This is the same isolation you proved in The Isolation Proof - you've just reached it over SSH instead of through the agent.
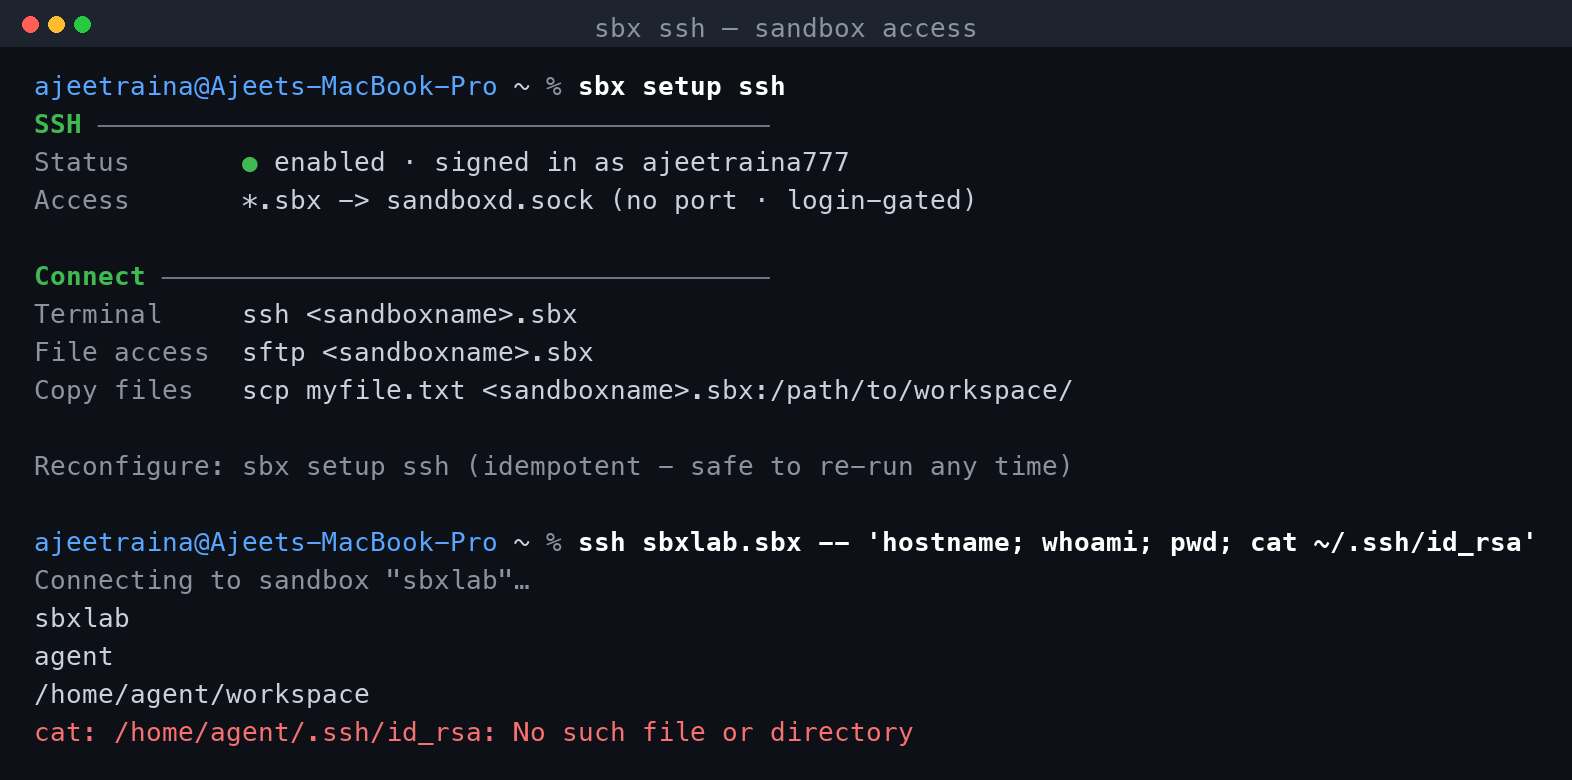
sbx setup ssh prints the endpoint panel; then ssh sbxlab.sbx runs inside the microVM - whoami is the sandbox's agent user and the host's ~/.ssh/id_rsa simply isn't there.
Type exit (or press Ctrl-D) to return to your host.
Step 3 - Run a one-off remote command
You don't have to open an interactive session. Append -- and a command to run it and come straight back:
ssh sbxlab.sbx -- echo hello
ssh sbxlab.sbx -- 'cd backend && pytest tests/ -q'
ssh sbxlab.sbx -- git -C ~/sbx-lab status
This is handy for scripting - CI-style checks, quick test runs, or grepping logs - without leaving your host shell.
Step 4 - Connect your editor (VS Code / Cursor)
Because the endpoint is standard SSH, any editor with a Remote-SSH extension can open the sandbox as a remote workspace.
- In VS Code (or Cursor), open the Command Palette (
Cmd-Shift-P). - Run Remote-SSH: Connect to Host…
- Enter the sandbox hostname:
sbxlab.sbx
- The editor opens a window running its server inside the sandbox. Your extensions, terminal, and file explorer now operate in the VM.
You get your full editor experience against the isolated environment - the agent's changes, the test runner, and the language server all live in the sandbox, while your host stays untouched.
Note: Remote-SSH installs a small server component inside the VM on first connect. That's expected - it lives in the sandbox, not on your host, and disappears when you
sbx rmthe sandbox.
Removing a sandbox won't silently recreate it
SSH connections don't auto-create sandboxes (auto-create is false by default). This is deliberate: if the connection recreated sandboxes on demand, an IDE reconnecting on every launch would spin up a fresh sandbox after you'd sbx rm'd the one you configured - a different sandbox than the one you set up. Instead, if the target no longer exists, the connection just fails. Recreate it yourself with sbx create <agent> . when you want it back.
Step 5 - Copy files over the connection
With the *.sbx config in place, the usual file-transfer tools just work:
# Pull a build artifact out of the sandbox
scp sbxlab.sbx:/home/agent/out/report.html ./report.html

# Sync a directory into the sandbox
rsync -av ./fixtures/ sbxlab.sbx:/home/agent/fixtures/
Prefer
sbx cpfor workspace files. For quick copies you can also use the built-in helper, which doesn't need SSH config at all:sbx cp ./config.json sbxlab:/home/agent/ sbx cp sbxlab:/home/agent/output.log ./
SSH vs. sbx exec - which do I use?
Both get you a command inside the sandbox. Pick based on your workflow:
ssh sbxlab.sbx |
sbx exec sbxlab … |
|
|---|---|---|
| Setup | sbx setup ssh once |
none |
| Best for | Editors (Remote-SSH), scp/rsync, external tools that speak SSH |
Scripting, running as root, docker exec-style flags |
| Interactive shell | ssh sbxlab.sbx |
sbx exec -it sbxlab bash |
| One-off command | ssh sbxlab.sbx -- <cmd> |
sbx exec sbxlab <cmd> |
| Run as root | n/a | sbx exec -u root sbxlab apt-get update |
| Starts a stopped sandbox | no (must be running) | yes (starts it first) |
Use SSH when a tool on your host expects an SSH target. Use sbx exec for quick, scriptable, one-shot commands and anything needing elevated privileges.
Exposing a service running in the sandbox
SSH gets you into the VM. To reach a service the agent started inside it (a dev server, an API), publish its port to the host:
# Publish sandbox port 8080 to an ephemeral host port
sbx ports sbxlab --publish 8080

# Or pin a specific host port
sbx ports sbxlab --publish 3000:8080

# List what's published
sbx ports sbxlab
Then open http://localhost:3000 on your host. This is separate from SSH - ssh is for a shell/commands, sbx ports is for network services.
The sandbox must be running first
sbx ports --publish only works on a running sandbox - a stopped VM has no network endpoint to bind to. If you see:
ERROR: publish ports: ... 500 Internal Server Error: ... no container endpoint with IP address found
the sandbox is stopped. Check with sbx ls (the STATUS column), then start it - sbx run sbxlab, or sbx exec sbxlab true to start it without attaching - and publish the port again.
Note that publishing a port only maps host → sandbox; it doesn't guarantee anything is listening inside. Confirm the service is up with ssh sbxlab.sbx -- 'ss -ltnp'.
✅ Checkpoint
Before moving on, confirm:
- [ ]
sbx setup sshadded a singleHost *.sbxblock to~/.ssh/config - [ ]
ssh sbxlab.sbxdrops you into a shell inside the VM (whoamishows the sandbox user,cat ~/.ssh/id_rsafails) - [ ]
ssh sbxlab.sbx -- echo helloruns a one-off command and returns - [ ] You understand SSH auth is brokered by the daemon + Docker login - no SSH key enters the sandbox
- [ ] You know when to reach for
sshvssbx execvssbx ports
Next: reviewing the changes your agent made before you trust them.